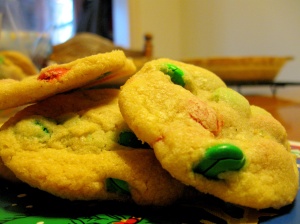
Candy Cookies

These cookies are very festive and easy! And tasty! From Betty Crocker’s Cookbook!

Ingredients:

  • 1/2 cup granulated sugar
  • 1/2 cup packed brown sugar
  • 1/3 cup margarine or butter, softened
  • 1/3 cup shortening
  • 1 teaspoon vanilla
  • 1 egg
  • 1 1/2 cups all-purpose flour
  • 1/2 teaspoon baking soda
  • 1/2 teaspoon salt
  • 1 package (8 oz) candies (red and green m&ms, in this case)

Heat oven to 375 F. Mix sugars, margarine, shortening, vanilla, and egg. Stir in remaining ingredients. Drop dough by heaping teaspoonfuls about 2 inches apart onto ungreased cookie sheet. Bake until light brown, 8-10 minutes. (centers will be soft). Cool slightly; remove from cookie sheet. Makes about 3 dozen cookies

Emily’s notes: My favorite scent ever is vanilla. Every time I bake with vanilla, I take a huge whiff of it and my insides get happy. I went to bake at my friend’s and she had imitation vanilla, and it did NOT smell the same. Nothing can beat the smell of pure vanilla extract. Period.

Soft Sugar Cookies

These cookies are a recipe my mother got from a  friend. They are soft and yummy, perfect for decorating!

Cookie Ingredients:

  • 1 2/3 cup sugar
  • 2 sticks butter
  • 1 1/2 teaspoons baking soda
  • 1 1/2 teaspoon salt
  • 2 eggs
  • 2/3 c. buttermilk (or 1 tablespoon of vinegar + milk)
  • 1 1/2 teaspoon vanilla
  • 4 3/4 cup flour
  • 1 1/2 teaspoon baking powder

Icing: (from Rockhill Mennonite Cookbook)

  • 2 1/3 cup confectioners’ sugar
  • 2/3 cup crisco
  • 3 tablespoons water
  • 1 tablespoon vanilla

For the cookies:

Cream together the sugar, margarine, baking soda, and salt until smooth. Add the eggs, buttermilk, and vanilla to the mixture and mix well. Mix the flour and baking powder separately and then add to the mixture and stir it all very well. Chill the dough overnight, or your cookies will not hold their shape as well when baking.

To cut out the cookies, flour a flat surface, such as a table with a layer of flour. Flour your rolling pin and roll the dough, not too thin, perhaps a quarter of an inch thick. Take your favorite cookie cutter shapes, dip them in flour, and carefully cut out shapes and place them on a pan and stick them in the oven for 6-8 minutes at 375F. DO NOT let them brown. You want them to be nice and light colored. They’re soft cookies.

While you let them cool, make the icing.

Icing:

Mix all of the ingredients together and beat for 5 minutes straight. This icing does not need to be refrigerated and can be kept for weeks in a tupperware container.

Separate the icing into different bowls, and mix different colors. Usually my family does red, green, blue, and white, but this year we found some neon food color and went a little crazy with the colors. Ice your cookies, and feel free to stick any kinds of candies, such as mini m&ms, or other small delectable treats on your cookies, personalize them and make them your own!

Best Strawberry Scones

This is the height of my baking accomplishments. This is my greatest accomplishment. This scone recipe is freaking amazing. I got the basic scone recipe from Cafe Ferando- http://cafefernando.com/strawberry-scones/ and the idea for the orange glaze and flavouring from http://bakingbites.com/2008/04/strawberry-sunrise-scones/– when I made the strawberry sunrise scones, they didn’t turn out well at all- I didn’t mix the yogurt in well or something, it was soggy and gross. But the flavour was good. I also got the idea to grate the butter in from a cooking video online- the colder the butter, the flakier the pastry will be. So, if you grate in frozen butter, it remains quite cold but is shredded into little pieces which can be incorporated into the dough. As far as I can tell, it works like a charm! So here they are, my wonderful scones.

STRAWBERRY SCONE RECIPE

Ingredients

  • 2 cups all-purpose flour
  • 1/3 cup granulated sugar
  • 1 tablespoon baking powder
  • 1/2 teaspoon table salt
  • 1/2 cup strawberries (I usually use them frozen, but I’m not sure it makes a difference)
  • 6 tablespoons frozen, unsalted butter
  • 3/4 cup heavy cream with 2 tsp orange zest
  • 2 large egg yolks, lightly beaten

For finishing:

  • 1 cup powdered sugar
  • 2 T orange juice

Method

  1. Position an oven rack in the lower third of the oven and heat the oven to 400 F (205 C). Line a heavy baking sheet with parchment paper. In a large bowl, whisk together the flour, sugar, baking powder and salt. Add the strawberries, tossing until evenly distributed and coated with flour (this allows the fruit to be evenly distributed among each wedge). Grate the frozen butter in with a cheese grater
  2. In a small bowl, stir the cream, orange zest, and egg yolks just to blend. Add this all at once to the flour mixture. Stir with a fork to begin combining the wet and dry ingredients and then use your hands to gently knead the mixture together until all the dry ingredients are absorbed into the dough and it can be gathered into a moist, shaggy ball.
  3. Do not overknead: This dough is sticky but benefits from minimal handling. Set the rough ball in the center of the prepared baking sheet and pat it gently into a round about 1 inch thick and 7 inches in diameter. Don’t be tempted to make the round any flatter.
  4. With a sharp knife or pastry scraper, cut the round into eight wedges, but don’t separate.
  5. Bake until the scones are deep golden and a toothpick inserted into the center of a wedge comes out clean, 18 to 22 minutes. Cut the scones apart and slide the parchment onto a rack and let cool for 10-15 minutes.
  6. Mix the glaze (sugar and orange juice)- drizzle over warm scones!
  7. Best served fresh, these scones will keep for up to a month, wrapped well and frozen. Thaw at room temperature and then warm in a 325 F oven.

Enjoy your delicious scones!

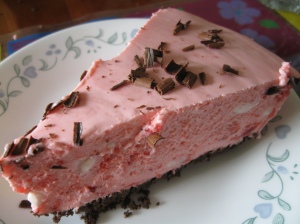
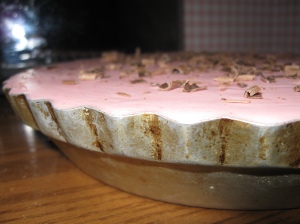
Strawberry Mousse Cheesecake

I have found true love! In the form of Mennonitegirlscancook .blogspot.com. I mean, seriously, these recipes look deliciously awesome. My mother told me I should use up some of our strawberries… so I searched strawberry. And found this beauty-

http://mennonitegirlscancook.blogspot.com/2011/02/strawberry-mousse-cheesecake.html

Crust

  • 1 1/4 cups chocolate wafer crumbs
  • 1/4 cup butter, melted

Combine melted butter and crumbs.  Press on bottom of 9-inch spring form pan. (I just used a regular pie pan, I’m not that fancy)

Filling 

  • 3 oz. / 85 gr. package strawberry flavoured gelatin
  • 1 envelope Knox unflavoured gelatin
  • 1 cup boiling water
  • 15 oz. (about 1 1/2 cups) frozen sliced strawberries
  • 8 oz. / 250 grams cream cheese
  • 2/3 cup icing (confectioner’s) sugar
  • 2 cups whipping cream
  •  Chocolate hearts & strawberries for garnish
  1. Mix gelatin powders together in a bowl.  Add boiling water and stir to dissolve.  Mix in partially thawed strawberries.  Chill until syrupy.
  2. Beat cream cheese and icing sugar together until smooth.
  3. Whip cream until stiff.  Fold into cream cheese mixture.
  4. Fold in thickened strawberry jello mixture.
  5. Pour over prepared crust.
  6. Chill for several hours before serving.
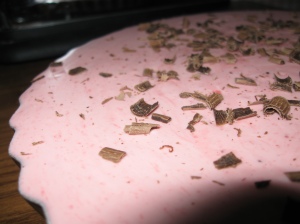
  7. Garnish with chocolate curls or hearts and fresh strawberries, if desired. (You can make chocolate shavings by taking a chocolate bar and peeling it with a vegetable peeler- it makes lovely garnish. I used dark chocolate :D )

Serves 10-12.

*Em’s notes- I had some issues at first but they all worked themselves out. I had trouble folding the cream cheese into the whipping cream- there were still chunks of cream cheese in the end result, but you couldn’t taste it or anything so it wasn’t a huge disaster- you wouldn’t be able to tell except for the fact that the chunks of cream cheese remained white while the rest is pink. I’m not quite sure how to avoid that- it’s really hard to get rid of chunks when you’re folding… Also I left the gelatin mixture in the fridge too long, and it turned to jello… obviously… so I microwaved it and rechilled it. There was almost too much filling for the pie pan, but it just barely fit without spilling! Everything worked out in the end, though, and it’s quite a light, deliciously fluffy desert!

Homemade Pop Tarts


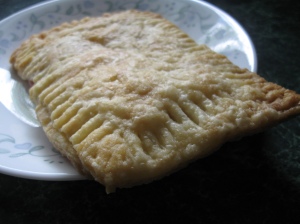
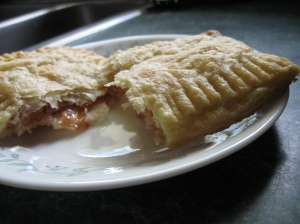
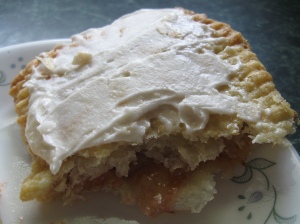
I love pop tarts. Especially whole wheat pop tarts. But that’s another day. Anyway, so of course I jumped at this chance to make homemade pop tarts! Yumm! Again, recipe thanks to Mennonite Girls Can Cook- I love this girls. They’re awesome. Makes me proud to be Mennonite. http://mennonitegirlscancook.blogspot.com/search?q=pop+tarts Basically these poptarts are just flaky pastry with some jam inside and some icing on top. Pretty delicious.

  • 1 1/2 cups flour
  • 3/4 teaspoon salt
  • 1 1/2 teaspoons teaspoons sugar
  • 3/4 cup chilled butter, cut in cubes
  • 4-5 tablespoons very cold water
  • Strawberry jam
  • Pear jam
  1. In a bowl whisk together the dry ingredients. I used a food processor to make this dough, but both methods work fine.
  2. With a pastry blender cut in the chilled butter till it’s the size of peas. (I like to use frozen butter and then grate it with a cheese grater. The colder the ingredients, the flakier the pastry. Plus it’s pretty handy if you don’t have a pastry blender.)
  3. Add the cold water a tablespoon at a time till the dough comes together. (I had to use 6 T because it wasn’t sticking together, just experiment)
  4. Form the dough into a ball and wrap in plastic wrap, pressing down into a disk. Refrigerate for 1 hour.
  5. Roll out into a rectangle and cut approx 3″ by 5 ” pieces. Place jam on the center of a cut piece of dough, top with another piece and seal the edges with the tines of a fork dipped in flour.
  6. Bake on a parchment lined pan at 375º for 25 to 30 minutes. I baked mine for 27 minutes.
  7. Let cool.
  8. You can leave them plain or ice them with your favorite frosting and top with sprinkles. (The frosting I used consisted of 3/4 cup confectioners sugar, 1/4 cup shortening, 1 T water, 1 t vanilla extract. You can add sugar and stuff to make it the way you want it if you want it sweeter or anything- it’s pretty simple)
  9. Yields: 5 pop tarts
Emily’s notes: These were pretty easy to make, the hardest part was making similar sized rectangles out of an oblongy bit of dough- it’s kinda hard to roll in perfect rectangles. But other than that, they were fairly simply and pretty tasty! 

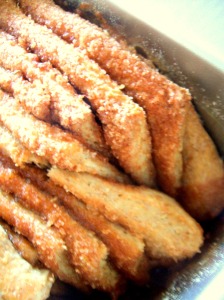
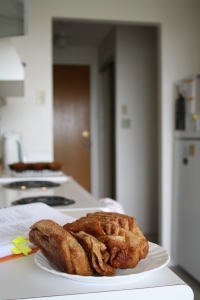
Cinnamon Sugar Pull Apart Bread

So delicious! A friend of mine blogged the recipe, and I couldn’t help but try it. So sweet and yummy. Link: http://www.joythebaker.com/blog/2011/03/cinnamon-sugar-pull-apart-bread/
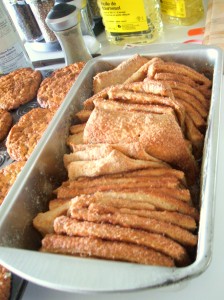
Cinnamon Sugar Pull-Apart Bread

Makes: one 9x5x3-inch loaf

Recipe adapted from HungryGirlPorVida

For the Dough:

  • 2 3/4 cups plus 2 tablespoons all-purpose flour (Emily: I used all whole wheat flour and it worked out fine. And healthier)
  • 1/4 cup granulated sugar
  • 2 1/4 teaspoons (1 envelope) active dry yeast
  • 1/2 teaspoon salt
  • 2 ounces unsalted butter
  • 1/3 cup whole milk (Emily: I used 2%. It was fine)
  • 1/4 cup water
  • 2 large eggs, at room temperature
  • 1 teaspoon pure vanilla extract

For the Filling:

  • 1 cup granulated sugar
  • 2 teaspoons ground cinnamon
  • 1/2 teaspoon fresh ground nutmeg (Emily: We didn’t have nutmeg. Probably would have enhanced, but again was more than edible)
  • 2 ounces unsalted butter, melted until browned

In a large mixing bowl (I used just the bowl of my stand mixer) whisk together 2 cups flour, sugar, yeast, and salt.  Set aside.

Whisk together eggs and set aside.

In a small saucepan, melt together milk and butter until butter has just melted.  Remove from the heat and add water and vanilla extract.  Let mixture stand for a minute or two, or until the mixture registers 115 to 125 degrees F.

Pour the milk mixture into the dry ingredients and mix with a spatula.  Add the eggs and stir the mixture until the eggs are incorporated into the batter.  The eggs will feel soupy and it’ll seem like the dough and the eggs are never going to come together.  Keep stirring.  Add the remaining 3/4 cup of flour and stir with the spatula for about 2 minutes.  The mixture will be sticky.  That’s just right. (Emily: Apparently with whole wheat flour, you need more liquid, so our dough wasn’t as sticky as it should have been, so if you’re using whole wheat flour you might wanna reduce the amount of flour a tad).

Place the dough is a large,  greased bowl.  Cover with plastic wrap and a clean kitchen towel.  Place in a warm space and allow to rest until doubled in size, about 1 hour.  *The dough can be risen until doubled in size, then refrigerated overnight for use in the morning.  If you’re using this method, just let the dough rest on the counter for 30 minutes before following the roll-out directions below.

While the dough rises, whisk together the sugar, cinnamon and nutmeg for the filling.  Set aside.  Melt 2 ounces of butter until browned.  Set aside.  Grease and flour a 9x5x3-inch  loaf pan.  Set that aside too.

Deflate the risen dough and knead about 2 tablespoons of flour into the dough.  Cover with a clean kitchen towel and let rest for 5 minutes.  On a lightly floured work surface, use a rolling pin to roll the dough out.  The dough should be 12-inches tall and about 20-inches long.  If you can’t get the dough to 20-inches long… that’s okay.  Just roll it as large as the dough will go.  (Emily: For some reason our dough was really elasticy, like pizza dough, so we had to be a little… violent. But it still worked ok. We beat it into shape). Use a pastry brush to spread melted butter across all of the dough.  Sprinkle with all of the sugar and cinnamon mixture.  It might seem like a lot of sugar.  Seriously?  Just go for it.

Slice the dough vertically, into six equal-sized strips.  Stack the strips on top of one another and slice the stack into six equal slices once again.  You’ll have six stacks of six squares.  Layer the dough squares in the loaf pan like a flip-book.  Place a kitchen towel over the loaf pan and allow in a warm place for 30 to 45 minutes or until almost doubled in size.

Place a rack in the center of the oven and preheat to 350 degrees F.  Place loaf in the oven and bake for 30 to 35 minutes, until the top is very golden brown.  The top may be lightly browned, but the center may still be raw.  A nice, dark, golden brown will ensure that the center is cooked as well.

Remove from the oven and allow to rest for 20 to 30 minutes.   Run a butter knife around the edges of the pan to loosen the bread and invert onto  a clean board.  Place a cake stand or cake plate on top of the  upside down loaf, and carefully invert so it’s right side up.  Serve warm with coffee or tea.

I think this bread is best served the day it’s made, but it can also we wrapped and kept at room temperature for up to 2 days.

Emily’s notes: Overall, ours was very successful. Whole wheat flour may have made the dough a little more dry than ideal, and kinda elasticy for rolling, but it still tasted absolutely delicious when we took it out of the oven. A must try. Basically like sticky buns but in bread form. Yum!
Easy Peanut Brittle

My favorite roomie ever who shares my love of baking brought this easy peanut brittle recipe. Quick and sugary- Just what I like!

Ingredients:

  • 1/2 cup peanuts
  • 1 tablespoon corn syrup
  • 1/2 cup sugar
  • 1/2 cup butter

Procedure:

Cut the butter into chunks so it melts evenly. Combine sugar, corn syrup, and butter in a large saucepan (larger than you think is necessary- it bubbles up.)

Heat over high heat, stirring constantly. It will bubble a lot and stuff, Keeeeeep stirring!

Add the peanuts when it gets to be a light brown color. Eventually it will turn the color of coffee with 2 creams. Not one cream, not 3 creams, 2 creams. Exactly. You have to be quick about it, and this apparently takes practice which I will experiment with eventually.

Then pour into a pan lined with parchment paper. Let cool and break into pieces! Yum!

Banana Muffins!

Got rotten bananas? Don’t be sad- Make some muffins! What better idea is there? http://allrecipes.com/Recipe/banana-muffins-ii/Detail.aspx

Ingredients

  • 1 1/2 cups all-purpose flour (Emily: I used all whole wheat flour. Worked fine :D)
  • 1 teaspoon baking powder
  • 1 teaspoon baking soda
  • 1/2 teaspoon salt
  • 3 large bananas, mashed (EMILY’S HINT: if you’re freezing bananas, peel them BEFORE you freeze them. It makes life easier, trust me. Otherwise only half the peel comes off. And that’s not pleasant)
  • 3/4 cup white sugar (We substituted 1/4 cup of brown sugar, so 1/2 c white and 1/4 c brown, cause brown is healthier or something I dunno, worked well)
  • 1 egg
  • 1/3 cup butter, melted
  •  OPTIONAL (Emily’s additions): 1 cup chocolate chips and 1/4 cup chopped pecans

Directions

  1. Preheat oven to 350 degrees F (175 degrees C). Coat muffin pans with non-stick spray, or use paper liners. Sift together the flour, baking powder, baking soda, and salt; set aside.
  2. Combine bananas, sugar, egg, and melted butter in a large bowl. Fold in flour mixture, and mix until smooth. Scoop into muffin pans.
  3. Bake in preheated oven. Bake mini muffins for 10 to 15 minutes, and large muffins for 25 to 30 minutes. Muffins will spring back when lightly tapped
Emily’s notes: Very easy muffins, worked really well, the tops came out kinda flat and we’re not sure what exactly happened, but they were quite tasty. I personally only like chocolate chips, but we put some nuts in Heathers’, so just do what you want, improvise a little. That’s what makes baking fun!