As an (almost) Canadian and an avid baker, I was incredibly excited when I heard that Canada was hosting a version of the Great British Bake off. Eagerly I hopped on the website and started reading the application, only to find the eligibility criteria stated that contestants must be “Canadian citizens or permanent residents.” At the time I was only on a work permit (#americanproblems so I did not qualify. Crestfallen, I resolved to watching the show with a mixture of admiration and envy, wishing that I was in that glorious baking tent.
But, if there’s a season 2, you can bet your bonnet I will put my name into the hat as I now am a permanent resident! And what better way to prepare than to attempt the challenges on the show. Cake week’s technical challenge was a Battenburg Cake, which I had never heard of before. So obviously, I decided to recreate my own version in my kitchen.
This is not an easy cake, as you may have guessed. It made a complete ridiculous mess of my kitchen. Gooey marshmallow was everywhere. (They say marshmallow fondant is easier than making the regular fondant… if that’s true, heaven help us). Honestly, I think I should get credit for making my own marshmallow fondant and marzipan, because I’m pretty sure the contestants didn’t have to do that. This cake is legitimately from scratch.
I also didn’t feel like scouring the grocery store to find pistachio paste, and I had strawberry flavouring and jam, so I switched up the flavours for my version. Chocolate and strawberry is a bit more appealing than pistachio and cherry, in my very humble opinion.
I sincerely apologize to my British readers (if they exist?) if changing the flavours of this cake is a disrespectful bastardization of a true Battenburg. But if there’s anything us Americans are good at, it’s taking a perfectly good thing and ruining it, like this horrific combination of donuts and burgers.

Long instructions:
Alright, so let’s start with the cake. Easy peasy. Preheat your oven to 375 F.
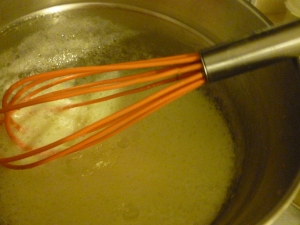
Cream together 1 1/3 cup room temperature butter and 1 1/8 cup white sugar until light and fluffy. Add in 5 eggs one by one until combined. Add 3/4 teaspoon vanilla. (Sorry for the weird quantities, I converted from grams to volume because that’s how I bake).
In a separate bowl combine 1 7/8 cups flour with 1 tablespoon baking powder. Add to the wet mixture and combine.

Think KitchenAid would sponsor me for this product placement??
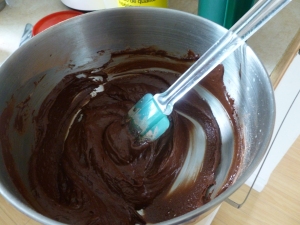
Split your batter evenly into 2 bowls. To one bowl, add 1/8 cup of cocoa powder. To the other bowl, add a couple drops of strawberry flavouring and red food colouring. Mix both well.
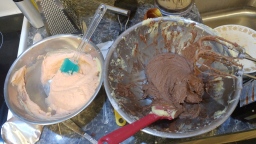
Mmm two delicious flavours, strawberry and chocolate!!! So much better than pistachio and cherry 😉
Prepare your pan by greasing the bottom and sides. I apparently do not own a 9×9 pan because I am a poor student, so I jerry-rigged a 9×13 to do the trick by implementing a false tinfoil wall. I suggest you make life easier and find a 9×9 pan. Take a piece of parchment paper and fold it up in the middle to make a little barrier between the two sides.
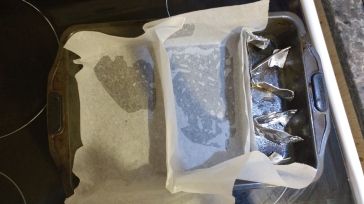
Yep. I did that. And it worked. Surprised even myself.
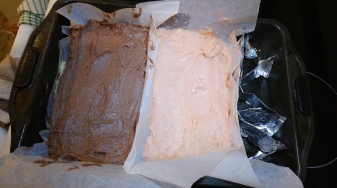
Then fill one side with the strawberry and other with the chocolate batter.
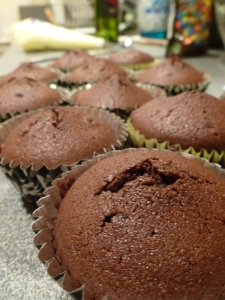
And bake! It should take approximately 25-30 minutes.
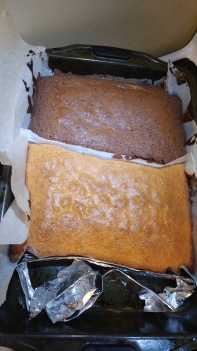
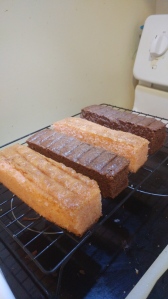
After they cool for 5 or so minutes, turn out onto a wire rack and let cool completely.
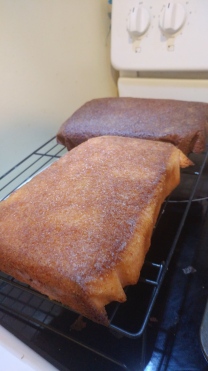
Clearly some trimming needs to be done here. You can see all the parchment paper grooves.
And now the fun part – marzipan and fondant! Let’s start with the marzipan. Now I will warn you that the only time I had heard of marzipan before this recipe was the character Marzipan from Homestarrunner.com, so I had absolutely no idea what I was making while I was making it, but it seemed to turn out ok.
Either get some whole almonds and grind them in a food processor, or buy ground almonds. I ground my own. You want 1 3/4 cup of ground almonds chilling in a food processor.

Stir together 1 cup sugar, 1/4 cup honey, and 2 tablespoons water in a small pot. Bring to a boil over high heat and sugar has dissolved.
Pour this sugar mixture into the food processor with the almonds while it’s running, until it’s one big goopy mess. Add 1 teaspoon almond extract.
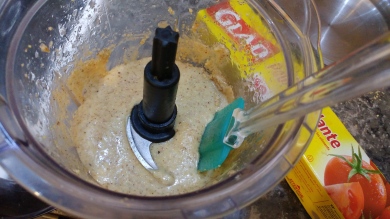
Does this seem right? I honestly had no clue.
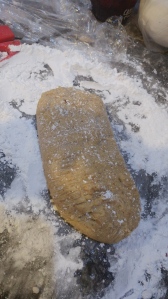
Pour the goop onto some plastic wrap, shape it into a log, and let cool at room temperature.

Not too shabby!
And now the marshmallow fondant. Good luck. Deceptively simple looking because of how few ingredients it requires, but working with melted marshmallows is a level of sticky hell.
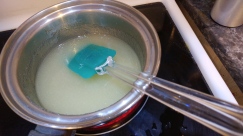
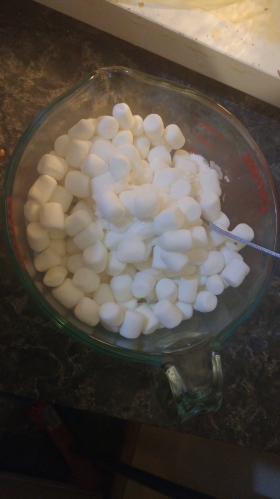
Melt 1 bag of mini marshmallows by microwaving for 30 seconds at a time and stirring in between.
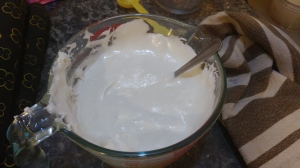
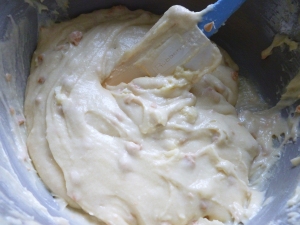
Once melted, combine the marshmallow with 3 cups of powdered sugar. I tried to use my hand mixer but it really did not work too well, sticky marshmallow all over my hands, the beaters, my counter…… so I think it might be easier just to get in there with your hands. There are not many pictures of this process as I was a sticky mess.
Knead this mixture until soft and shiny, adding the last cup of sugar bit by bit and adding a little water at a time if it feels dry. Eventually you’ll have a ball of edible model magic (grade school, anyone?). If you want you could knead in some food colouring at this point, but I chose to leave it white. Wrap in plastic wrap until you’re ready to work with it.
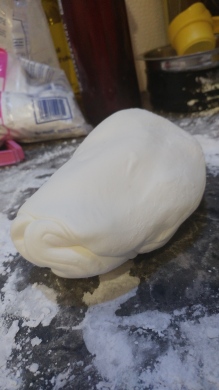
This lump of fondant is probably your sugar quota for the year. Or decade.
And now… the assembly!!! Where you discover whether your hard work will pay off with a technically inspiring masterpiece, or look like a wonky sad cake that looks like it’s had better days.
Prepare the jam by putting 3/4 cup of strawberry jam in a small saucepan and warming on the stove.
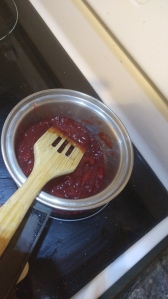
Then press the jam through a sieve to strain out any lumps or seeds. You should have a bowl of smooth jam.

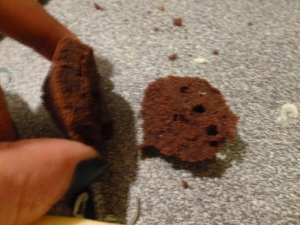
Take the cake and stack on top of each other. Trip the edges until you have 2 identically sized rectangles. If you need to, trim the top so it’s level as well. This will create many delicious cake pieces for you to snack on while trying to conquer this challenge.
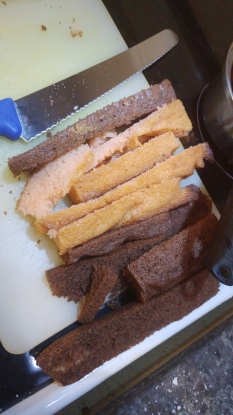
My favourite part of baking: snacking as you go
Then, cut the rectangles in half so you have 4 rectangles.
Little cake bricks waiting to be assembled!
Coat the inside long edges of two of the opposite coloured rectangles with jam and stick together horizontally. Do the same with the other two. Then, coat the top of two rectangles with jam and place the other two cake rectangles on top, alternating the colour of the rectangles. You should get a checkerboard. Essentially, you want the 4 pieces of cake together with jam lining all the seems to glue them together.
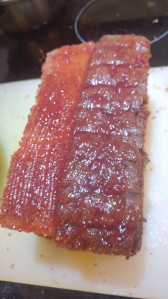
The jam is the glue, so be generous, unless you want your cake to fall apart. Which you don’t.
So pretty! Starting to look like a Battenburg
Sprinkle your counter generously with icing sugar and roll out the marzipan into a thin rectangle.
 Make sure it’s 4 times as wide as your cake is wide, as it’ll need to wrap around all 4 sides. Coat the top of the cake with jam and then invert, jam side down, onto the middle of the marzipan. Then, coat both long sides and top with jam and wrap with marzipan, like you would a present. Don’t worry about the checkerboard ends, as you’re trimming them off anyway.
I had a horrible time with this step, as you can see below, because my marizpan was not rolled out big enough. Make sure you roll it out big – you can always trim the excess. Thankfully, you can cover this layer with fondant, so all is not lost.

Yep. This was really sad… who knows what the judges would say if they saw this sorry mess.
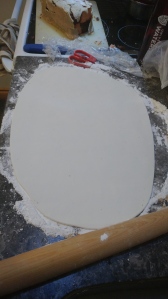
Do the same with the fondant – roll out into a thin rectangle on a counter dusted with icing sugar.
Brush the marzipan with water, then place in the middle of the fondant and wrap. Trim as needed so that the ends meet perfectly in the middle. Then place seem side down on your serving dish.
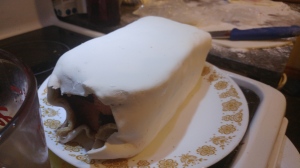
Nicely recovered, you can’t tell the marzipan is in pieces! Looking good. I never thought I’d say this, but thank goodness for fondant!
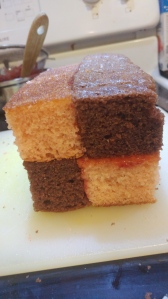
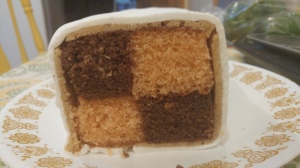
Trim off the edges so that you have a nice clean open face cake and let that checkerboard show!
You may notice the sides are gaping a bit. That’s because I forgot to coat all sides with jam. So learn from this and coat every freaking side with jam.
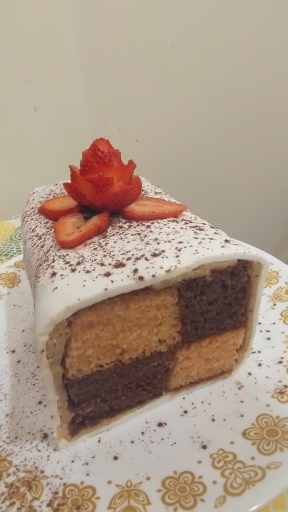
And lastly, garnish the top. I topped with a dusting of cocoa powder, a strawberry rose, and some strawberry slices, but feel free to be creative!
")
")
")
And voila! A yummy chocolate strawberry Battenburg that is sure to impress your friends and family.
Ingredients:
- Cake
- 1 1/3 cup room temperature butter
- 1 1/8 cup white sugar
- 5 eggs
- 1 7/8 cup flour
- 1 tablespoon baking powder
- 3/4 teaspoon vanilla extract
- 2 drops strawberry flavouring
- red food colouring
- 1/8 cup cocoa powder
- Marzipan
- 1 3/4 cup ground almonds (you can grind yourself in a food processor)
- 1 cup white sugar
- 1/4 cup honey
- 2 Tablespoons water
- 1 teaspoon almond extract
- Marshmallow fondant
- 4 cups icing sugar
- 1 bag mini marshmallows
- For assembly:
- 3/4 cup strawberry jam
- cocoa powder
- 2-3 strawberries
Short instructions:
Preheat your oven to 375 F.
Cream together 1 1/3 cup room temperature butter and 1 1/8 cup white sugar until light and fluffy. Add in 5 eggs one by one until combined. Add 3/4 teaspoon vanilla.
In a separate bowl combine 1 7/8 cups flour with 1 tablespoon baking powder. Add to the wet mixture and combine.
Split your batter evenly into 2 bowls. To one bowl, add 1/8 cup of cocoa powder. To the other bowl, add a couple drops of strawberry flavouring and red food colouring. Mix both well.
Prepare your pan by greasing the bottom and sides. Take a piece of parchment paper and fold it up in the middle to make a little barrier between the two sides.
Then fill one side with the strawberry and other with the chocolate batter.
Bake for approximately 25-30 minutes.
Let the cake cool for 5 or so minutes, turn out onto a wire rack and let cool completely.
Marzipan:
Place 1 3/4 cup of ground almonds in a food processor.
Stir together 1 cup sugar, 1/4 cup honey, and 2 tablespoons water in a small pot. Bring to a boil over high heat and sugar has dissolved.
Pour this sugar mixture into the food processor with the almonds while it’s running until combined. Add 1 teaspoon almond extract.
Pour the mixture onto some plastic wrap, shape it into a log, and let cool at room temperature.
Marshmallow fondant:
Melt 1 bag of mini marshmallows in the microwave by nuking for 30 seconds at a time and stirring in between.
Once melted, combine the marshmallow with 3 cups of powdered sugar.
Knead this mixture until soft and shiny, adding the last cup of sugar bit by bit and adding a little water at a time if it feels dry. Wrap in plastic wrap until you’re ready to work with it.
Assembly:
Prepare the jam by putting 3/4 cup of strawberry jam in a small saucepan and warming on the stove. Then press the jam through a sieve to strain out any lumps or seeds.
Take the cake and stack on top of each other. Trip the edges until you have 2 identically sized rectangles. If you need to, trim the top so it’s level as well.
Then, cut the rectangles in half so you have 4 rectangles.
Coat the inside long edges of two of the opposite coloured rectangles with jam and stick together horizontally. Do the same with the other two. Then, coat the top of two rectangles with jam and place the other two cake rectangles on top, alternating the colour of the rectangles. You should get a checkerboard. Essentially, you want the 4 pieces of cake together with jam lining all the seems to glue them together.
Sprinkle your counter generously with icing sugar and roll out the marzipan into a thin rectangle.
Make sure it’s 4 times as wide as your cake is wide, as it’ll need to wrap around all 4 sides. Coat the top of the cake with jam and then invert, jam side down, onto the middle of the marzipan. Then, coat both long sides and top with jam and wrap with marzipan.
Do the same with the fondant – roll out into a thin rectangle on a counter dusted with icing sugar.
Brush the marzipan with water, then place the cake in the middle of the fondant and wrap with the fondant Trim as needed so that the ends meet perfectly in the middle. Then place seem side down on your serving dish.
Trim off the edges so that you have a nice clean open face cake.
And lastly, garnish the top. I topped with a dusting of cocoa powder, a strawberry rose, and some strawberry slices, but feel free to be creative!
Recipe adapted from:
http://www.cbc.ca/food/recipes/recipe-battenberg-cake
http://www.foodnetwork.ca/recipe/homemade-marzipan/16562/


